KEPServerEX
In this guide we're going to show you how to connect your KEPServerEX to Clarify, using the built in IoT Gateway. KEPServerEX is, according to their webpage, the industry's leading connectivity platform that provides a single source of industrial automation data to all of your applications.
Follow this guide and you will be able to visualize your data and share it with your colleagues within minutes. We have used KEPServerEX V6.11 in this guide, but have confirmed that the template works for lower versions as well.
Add Clarify as an IoT Gateway
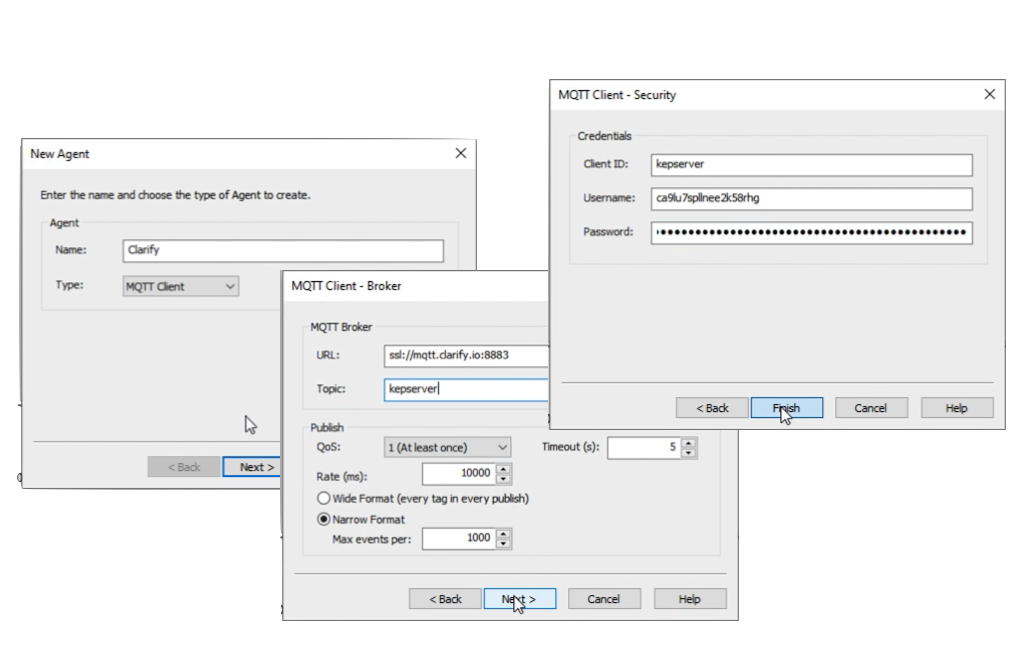
Right click IoT gateway and choose New Agent, give it a name and choose MQTT Client as the type.
For the url enter the address to the Clarify broker ssl://mqtt.clarify.io:8883 and set the topic to kepserver to allow correct parsing. The username and password is created on the credentials tab of your desired Clarify integration.
For MQTT you need to create credentials of type Basic Auth.
Learn how to create an integration here

Change message template
To be able to send data to Clarify you will have to change the default message template to allow correct encoding of the MQTT payload.
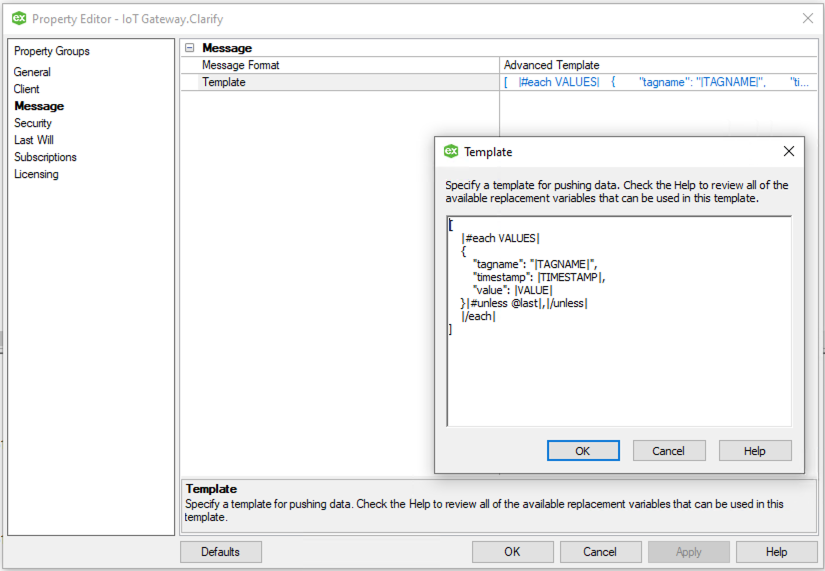
This is done by right clicking the newly created IoT Gateway and choosing properties. Navigate to Message and change the Message Format from Standard Template to Advanced Template.
Click the Template field and paste the following message format:
[
    |#each VALUES|
    {
        "tagname": "|TAGNAME|",
        "timestamp": |TIMESTAMP|,
        "value": |VALUE|
    }|#unless @last|,|/unless|
    |/each|
]

Add tags to log
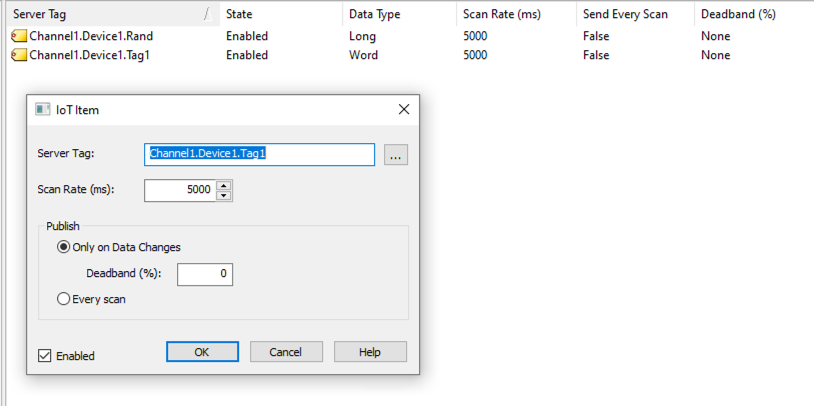
Now you can add all the tags you want to log. Just remember to review the scan-rate and deadband settings to avoid sending more data then necessary. After this step the tags should appear as signals in your Clarify integration.

Video guide showing all the steps
If you found any errors, ambiguities or have any suggestions on how to make this guide better, please contact us via chat or send an email to hello@clarify.io 🙌
Disclaimer By using our guides you agree to the following disclaimer.