Modbus
Modbus is a messaging structure developed by Modicon in 1979, used to establish client-server communication between intelligent devices.
Modbus is often used to connect a plant/system supervisory computer with a remote terminal unit (RTU) in Supervisory Control and Data Acquisition (SCADA) systems in the electric power industry. Many of the data types are named from industrial control of factory devices, such as Ladder logic because of its use in driving relays: A single physical output is called a coil, and a single physical input is called a discrete input or a contact. Source: Wikipedia

There are several versions of the Modbus protocol, but in general, one differentiates between Modbus RTU (serial) and Modbus TCP (Ethernet). This guide will show how to connect to, and read data from a device over Modbus TCP, but the steps should be easily transferred to RTU.
Control System setup
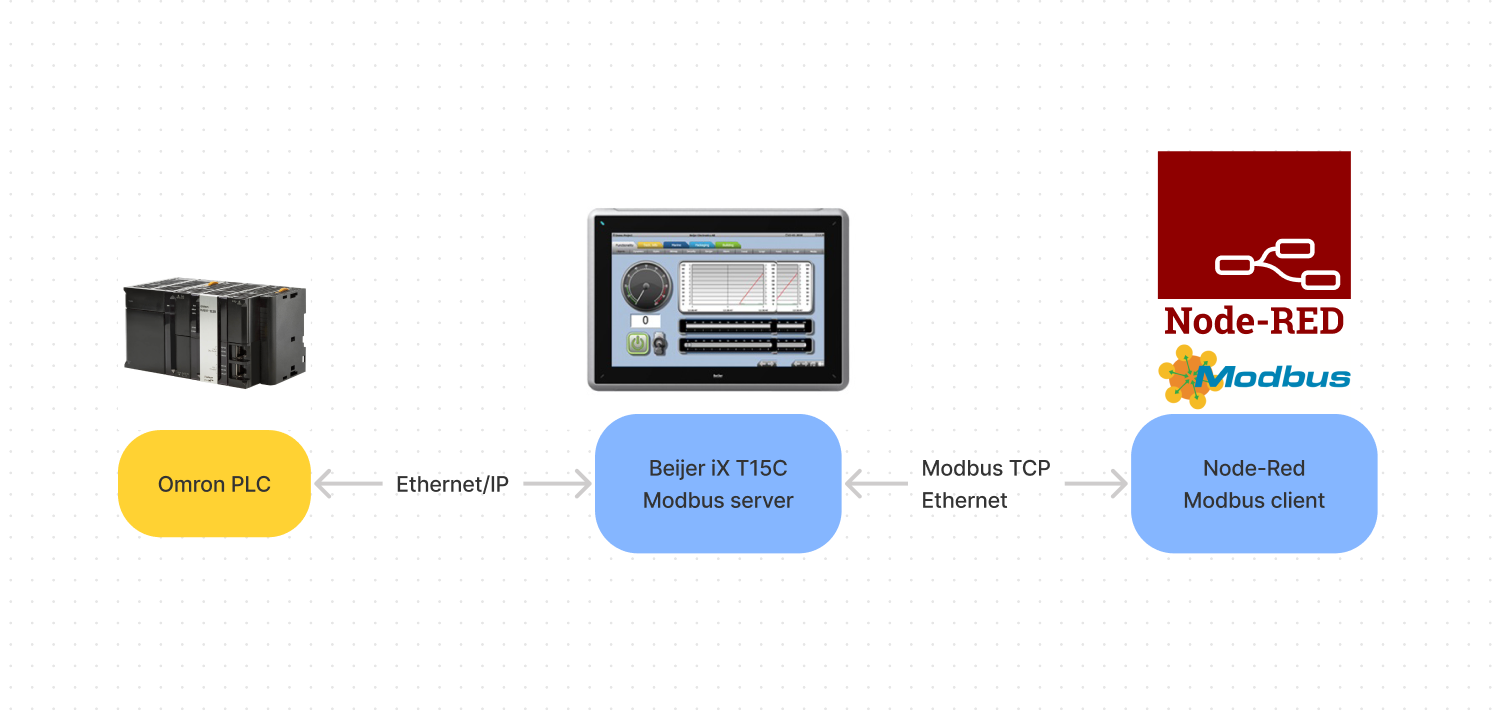
In our office, we have a demo wall with different components used in industrial control systems. For this guide, we have connected an Omron NJ501 PLC to a Beijer HMI over Ethernet/IP. The PLC is programmed to expose random values on different tags that are read and displayed on the HMI. Since the Beijer HMI includes a programmable IX Runtime it lets us enable and expose the values via a Modbus server.
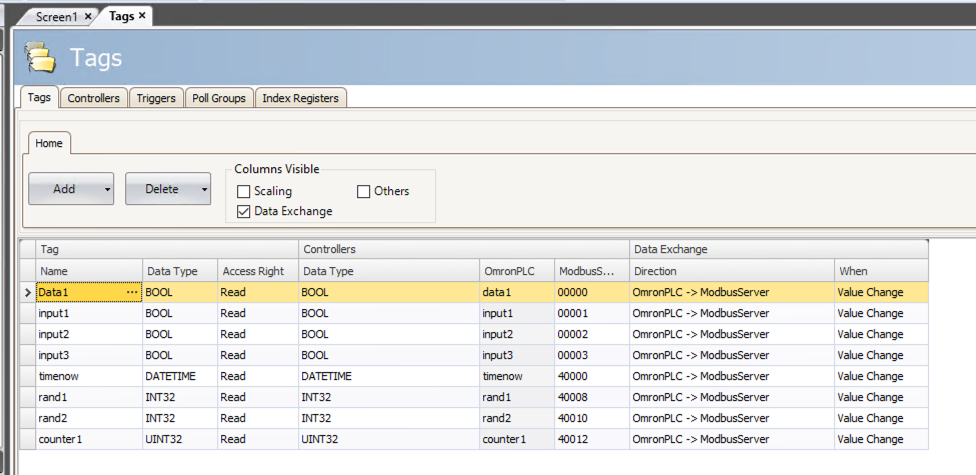
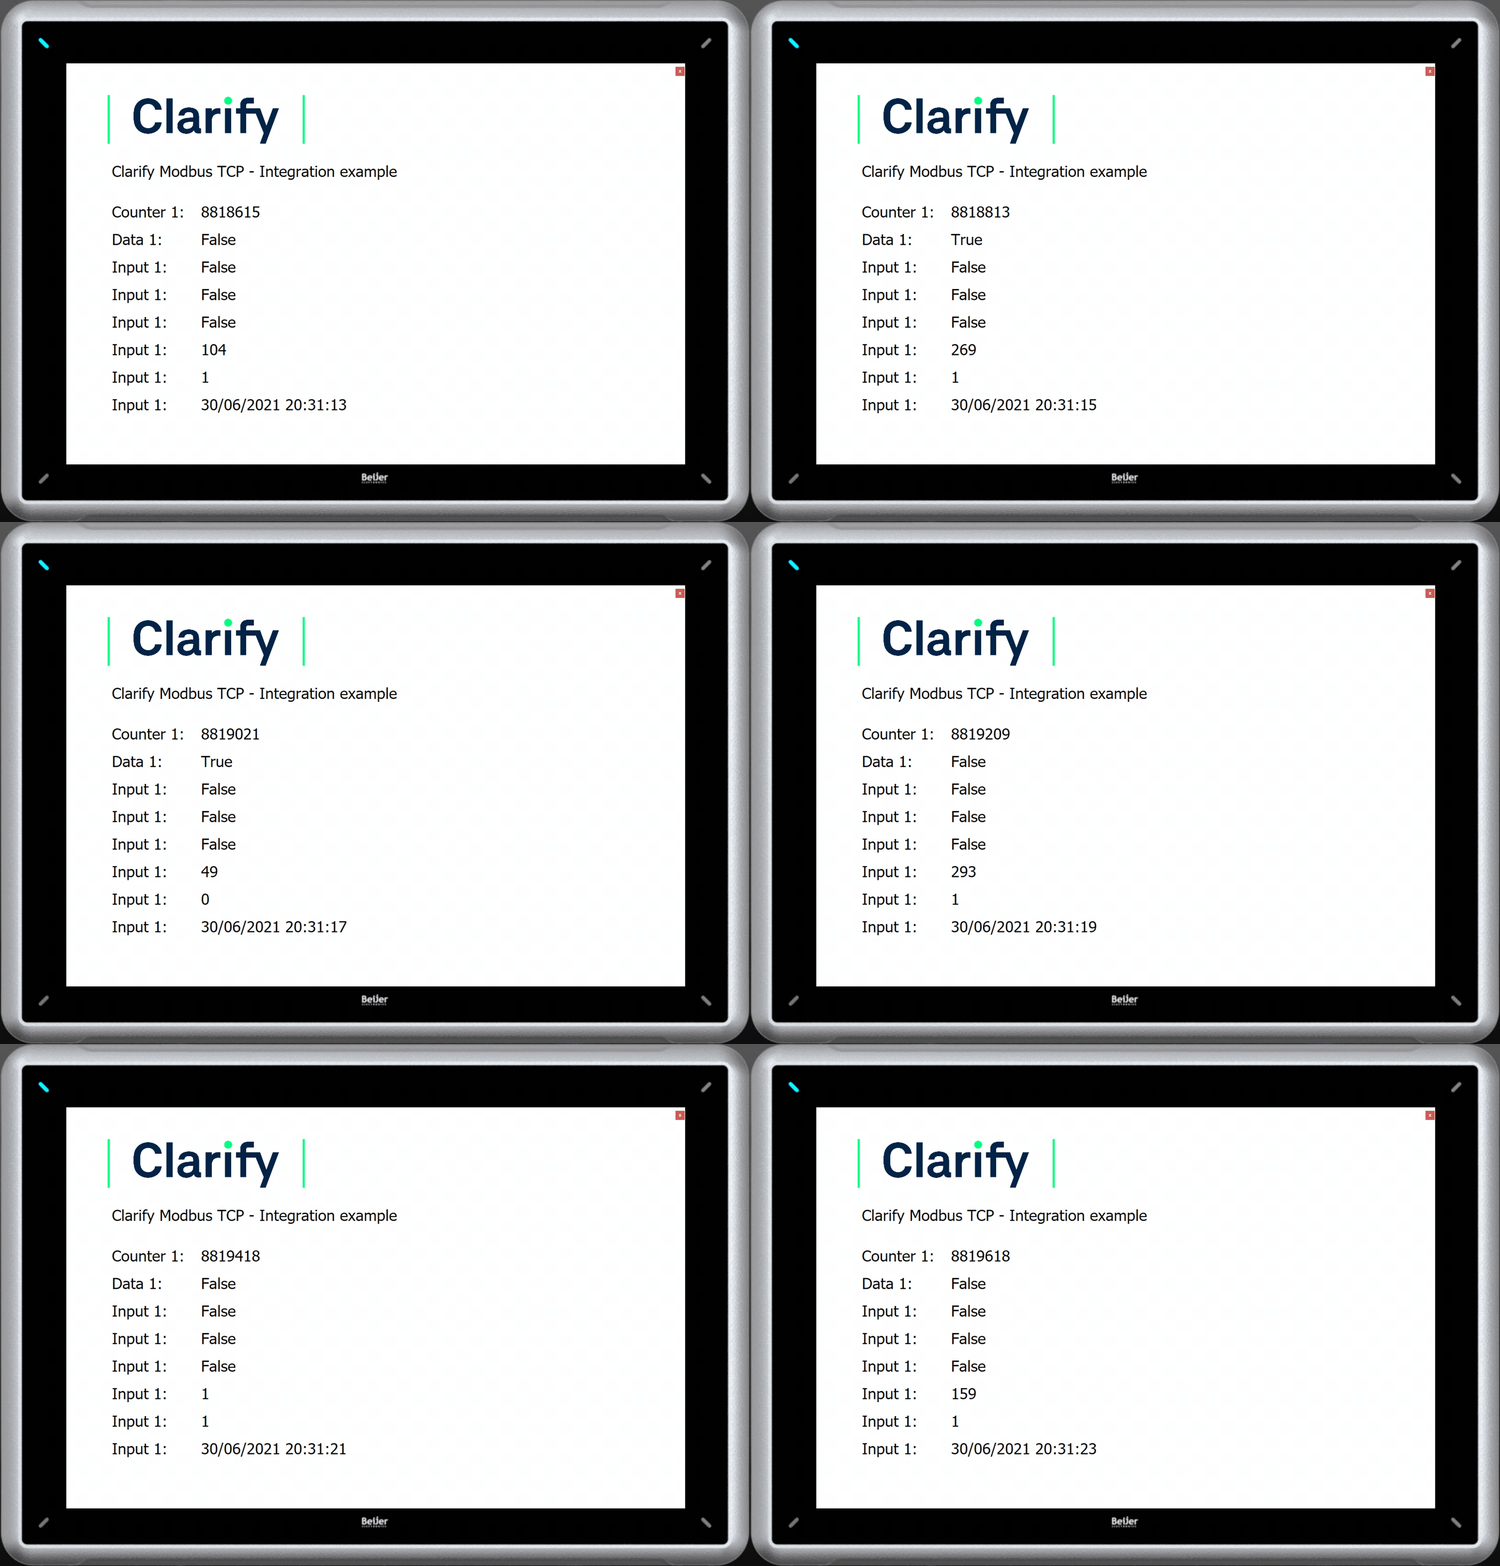
The setup on the Beijer HMI is shown in the picture below and after transferring the project from iX Developer to the HMI we see the values change on the panel and are ready for the next step of the guide; read the values over Modbus from our Node-RED client and transfer that data to Clarify.
To learn more about the Modbus protocol you can find many excellent guides online, this one by Control Solutions is quite thorough: Modbus Guide.
Node-RED Modbus setup
Searching the palette for Modbus gives a lot of hits, and for this guide, we tested a few alternatives but ended up with the most popular one; node-red-contrib-modbus.
To be able to parse the data received over Modbus (16 bits chunks) into the correct variable sizes we need the following package, available, also available from the palette: node-red-contrib-buffer-parser.
The node-red-contrib-modbus package contains many different nodes that one can experiment with, but for now, we'll stick with a few simple read nodes, starting with reading the counter value available in holding register 12, not 40012 as one would think by looking at the Beijer Tag list, the 4 is just a way to show that this is a holding register. (Read the Modbus guides if this is confusing 🙈)
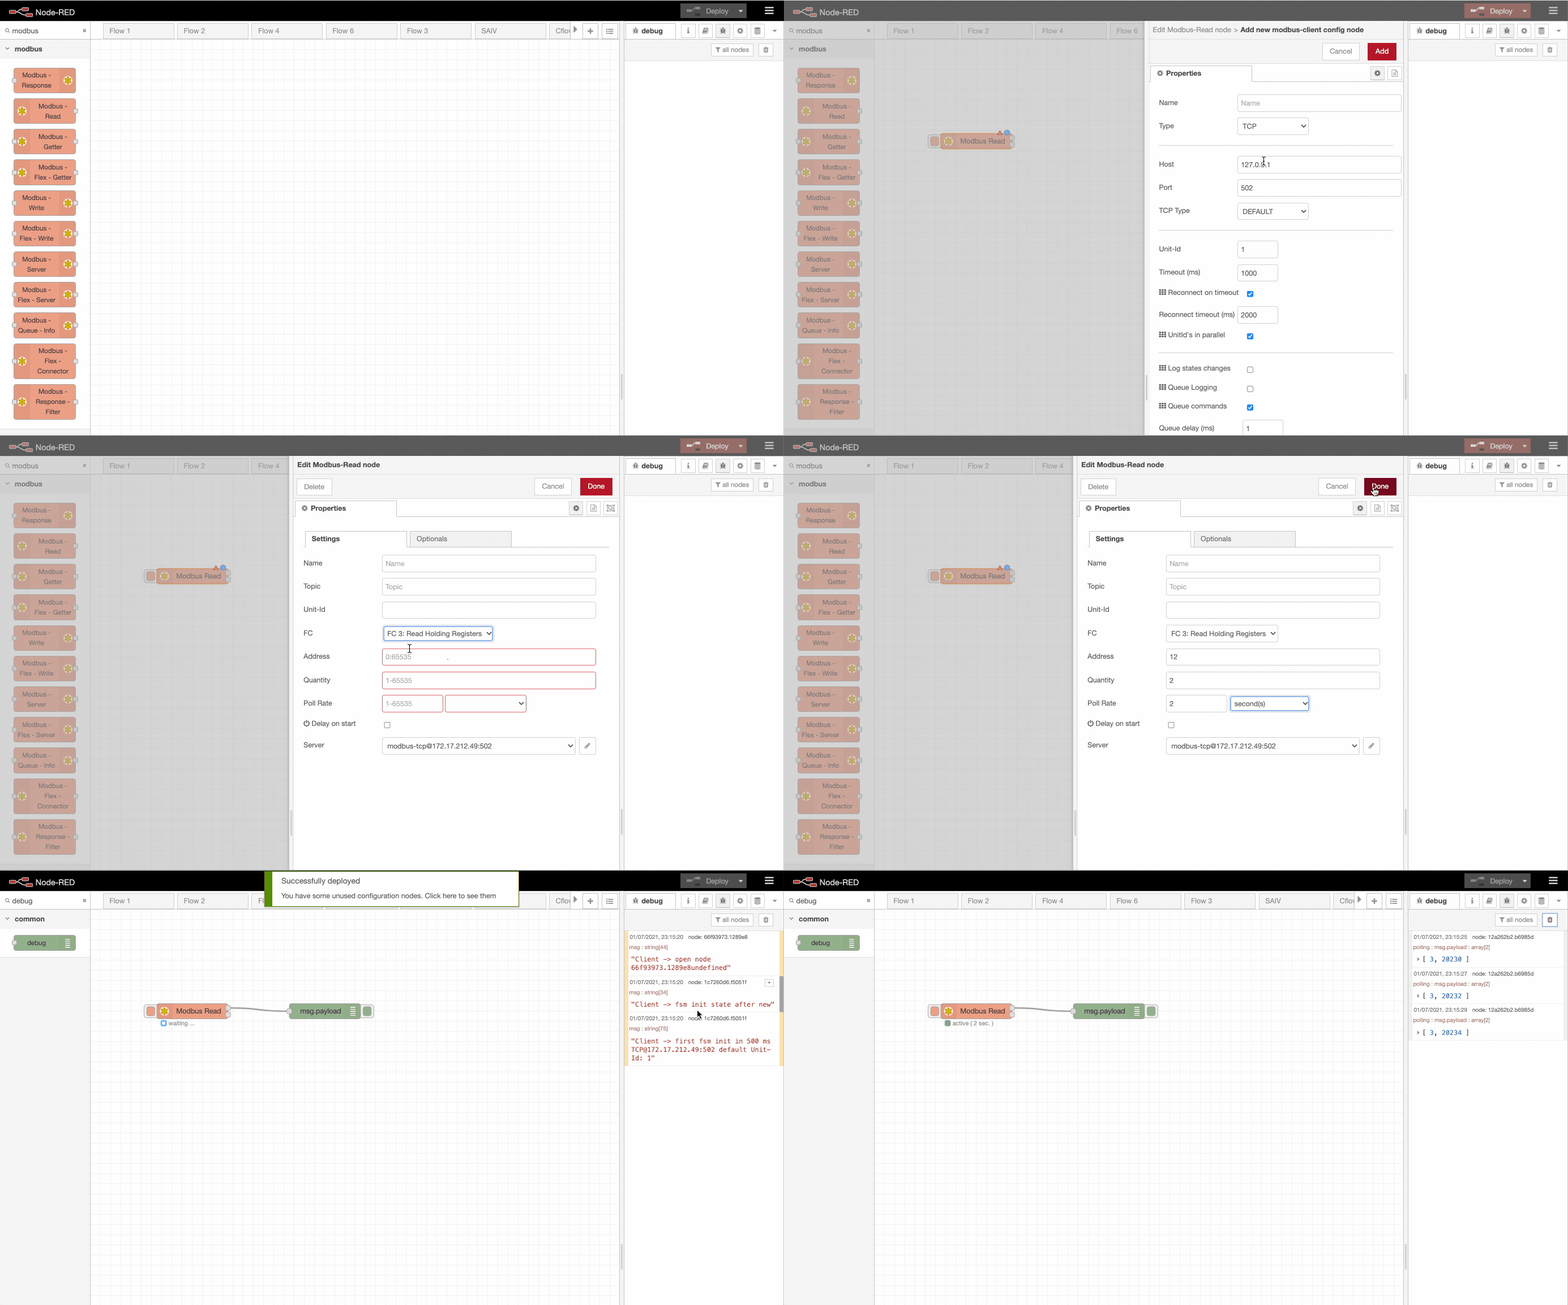
As you can see above, after setting up the necessary configuration we can see the values of our two 16-bits registers (soon to be uint32), start to appear in the debug pane to the right.
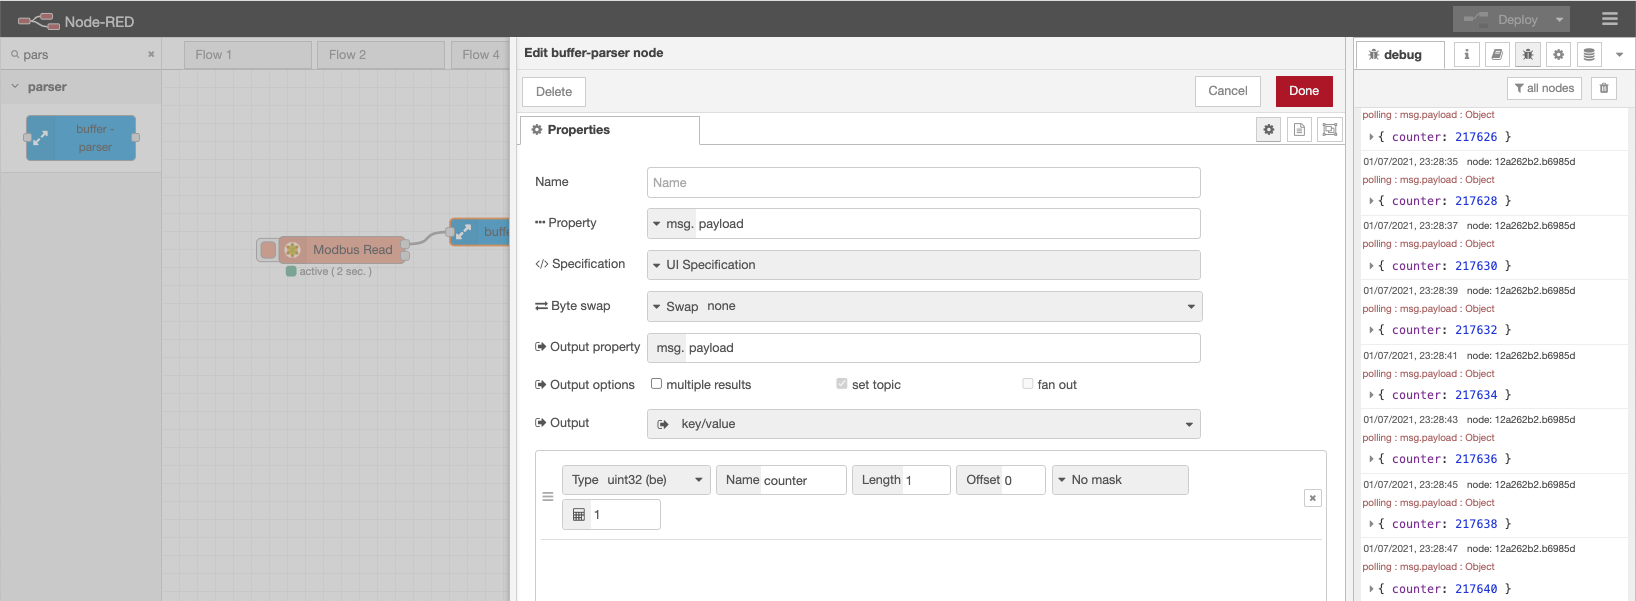
The next thing to do is to drag in a buffer-parser node that will combine the two values into a uint32 variable. Since Modbus is a "big-endian" protocol: that is, the more significant byte of a 16-bit value is sent before the less significant byte we choose type uint32 (be), give the variable the name counter and deploy a new version.
With a polling rate of 2 seconds, we see the number increment by two since the PLC updates the counter every second. To get every count we would need to lower the polling frequency and add a node to filter the result to avoid logging duplicate values, more on that later.
Prepare data for Clarify
Read the general section about how to get started with the Clarify Nodes here: Using Clarify Nodes
To prepare the data for Clarify we use a function node and write in the code below. This creates the data format that the Clarify Insert Node expects and sets the time to now. (Change topic to match your desired input ID)
let now = new Date().toISOString();
msg.topic = "counter";
msg.payload = {
  times: [now],
  values: [msg.payload.counter],
};
msg.signal = {
  name: "Omron Counter ",
};
return msg;
Some readers might argue that this might not be the correct time, and they are quite correct, but since Modbus is a polling protocol and no time information is provided by default the current time is a good approximation of the value received.
After adding the Clarify insert node and letting it run for some time, a new signal should be available in the Clarify Admin Panel. Publishing it and looking at the data shows a steadily increasing counter.

If you found any errors, ambiguities or have any suggestions on how to make this guide better, please contact us via chat or send an email to hello@clarify.io 🙌
Disclaimer By using our guides you agree to the following disclaimer.