SIA Connect (MQTT)
In this guide we'll show you how to connect your SIA device to Clarify via MQTT.
Some terminology used by SIA Connect in this article have similarity with terminology in Clarify. When we refer to the word "item" in this article, it's a reference to the items concept in the SIA software, and not items in Clarify. For details about SIA concepts, check out the Glossary in their documentation.
For description of clarify concepts, check out the concepts section.
SIA
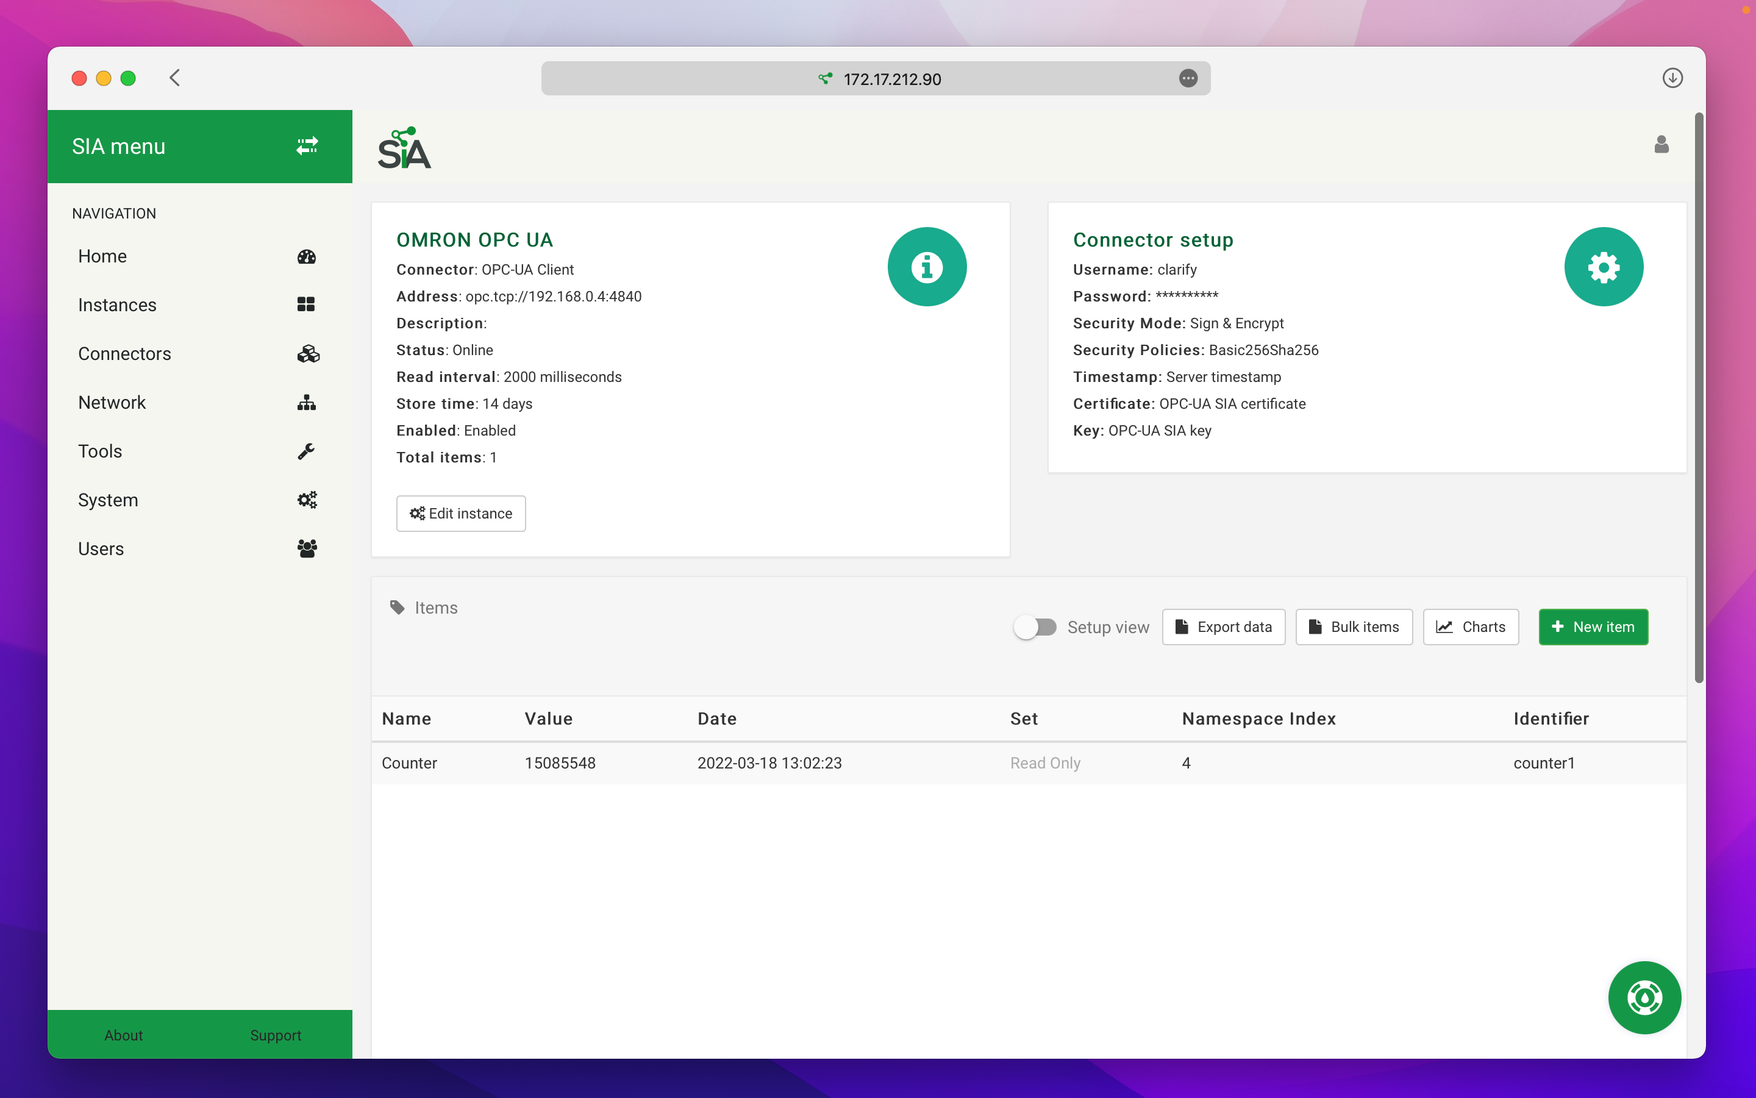
Navigate to the web portal of your SIA device, and open the "Instance" option. In this example, we will connect to an OPC UA server running on an Omron device that we've set up for the occassion.
The first thing we are going to do is to create an MQTT instance and connect it to Clarify. To do so, navigate to the "Instance" menu in SIA, press "Add new instance" and choose "MQTT" as the connector option. For the settings, choose:
- General info:
- Name: Clarify
- Address: mqtt.clarify.io
- Unique ID: clarifymqttdemo
To finalize the setup, we'll need to open Clarify to find the correct username and password to use. In Clarify, the ability to write data is linked to an integration, so to use the MQTT option, we will need to create an integration (or use an existing one) and issue a set of Basic Auth credentials that we can use to authenticate with.
Once we have the credentials ready, we are going to use the username and password to fill the fields in the "Connector setup".
- Connector setup:
- Port: 8883
- Username: username from credentials
- Password: password from credentials
Now we need some data to send to Clarify to test if the connection works. You can use whatever you want, but in this example we've set up an OPCUA connection to an Omron device. For a detailed overview of using the OPCUA module in SIA, we recommend you check out their documentation.
The concept in SIA is that we create an item on each of the instances, and a mapping between them. Using the mappings, we can do things like only writing data when certain conditions are met, or formatting the data differently. Since we already have an item created for the OPC UA instance, let's begin by creating another item in the Clarify instance where we will write the data.
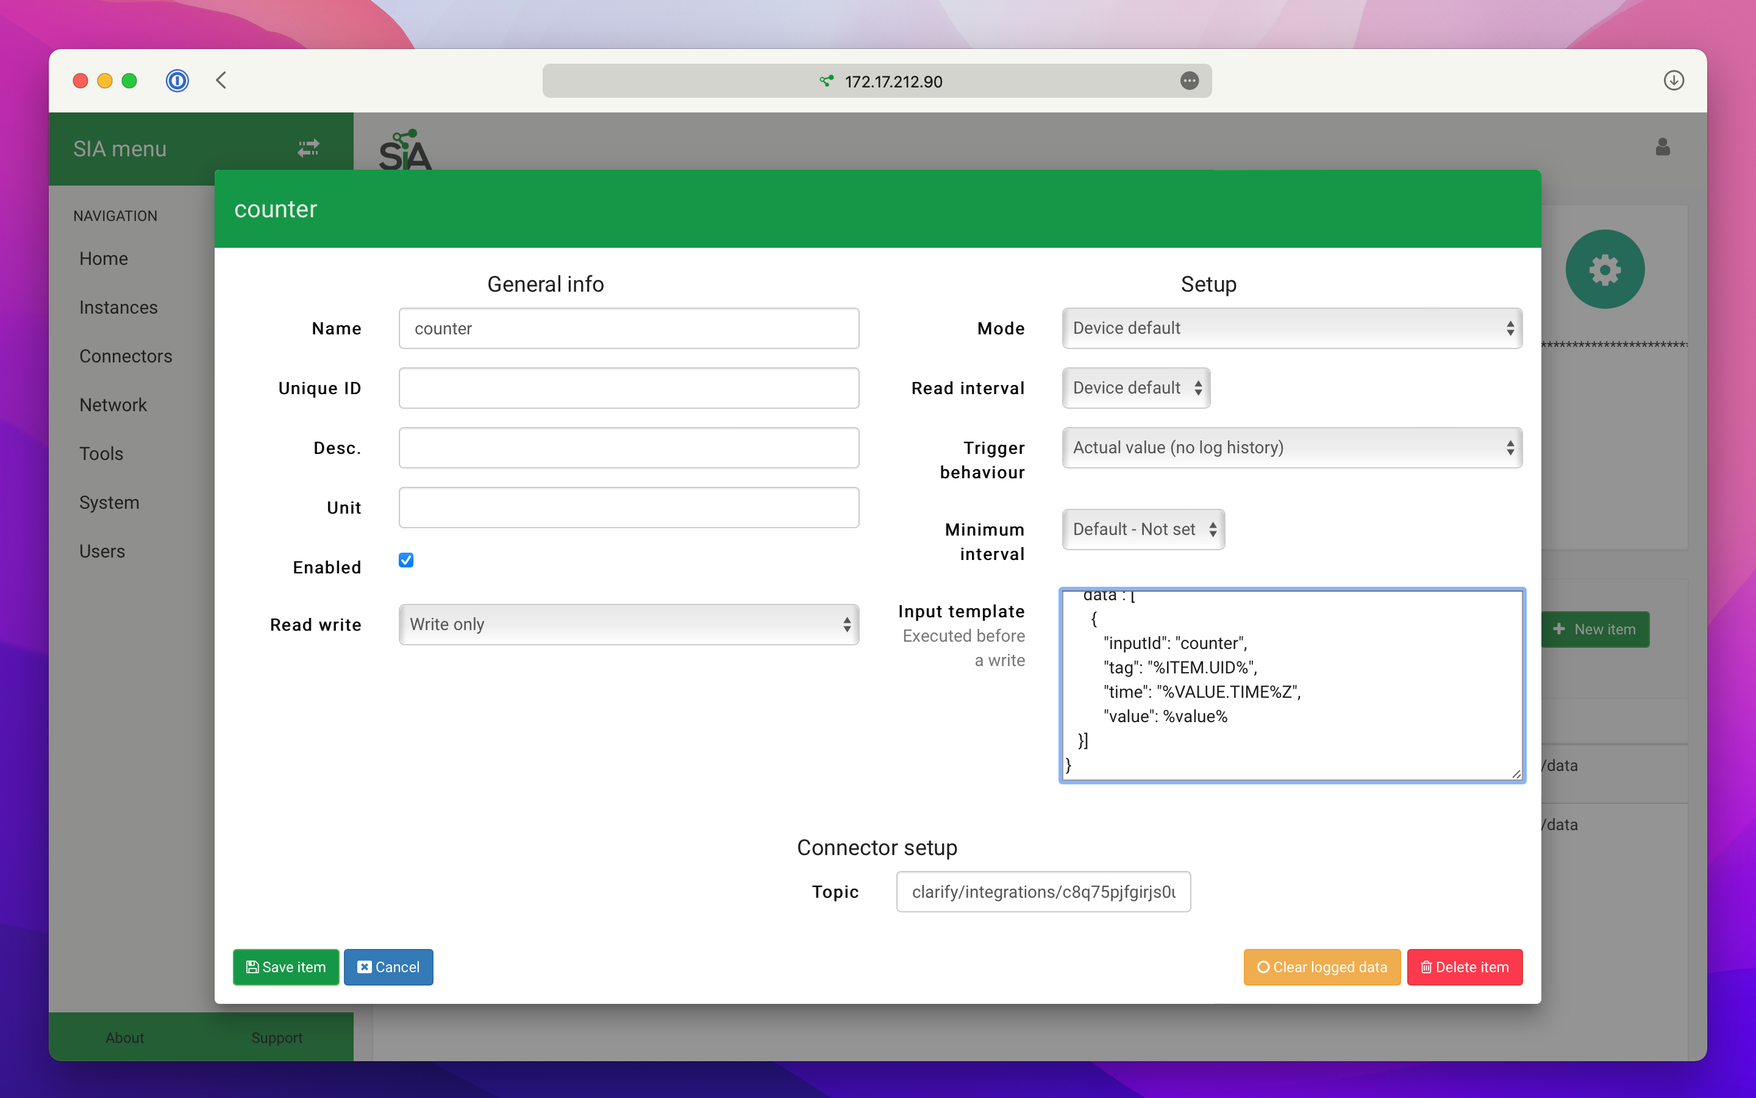
Open the newly created MQTT instance and create a new item with these settings:
- General info:
- Name: counter
- Read write: Write only
- Connector setup:
- Topic: json1/data
- Input template:
{
   "data": [
      {
         "inputId": "counter",
         "tag": "%ITEM.UID%",
         "time": "%VALUE.TIME%Z",
         "value": %value%
   }]
}
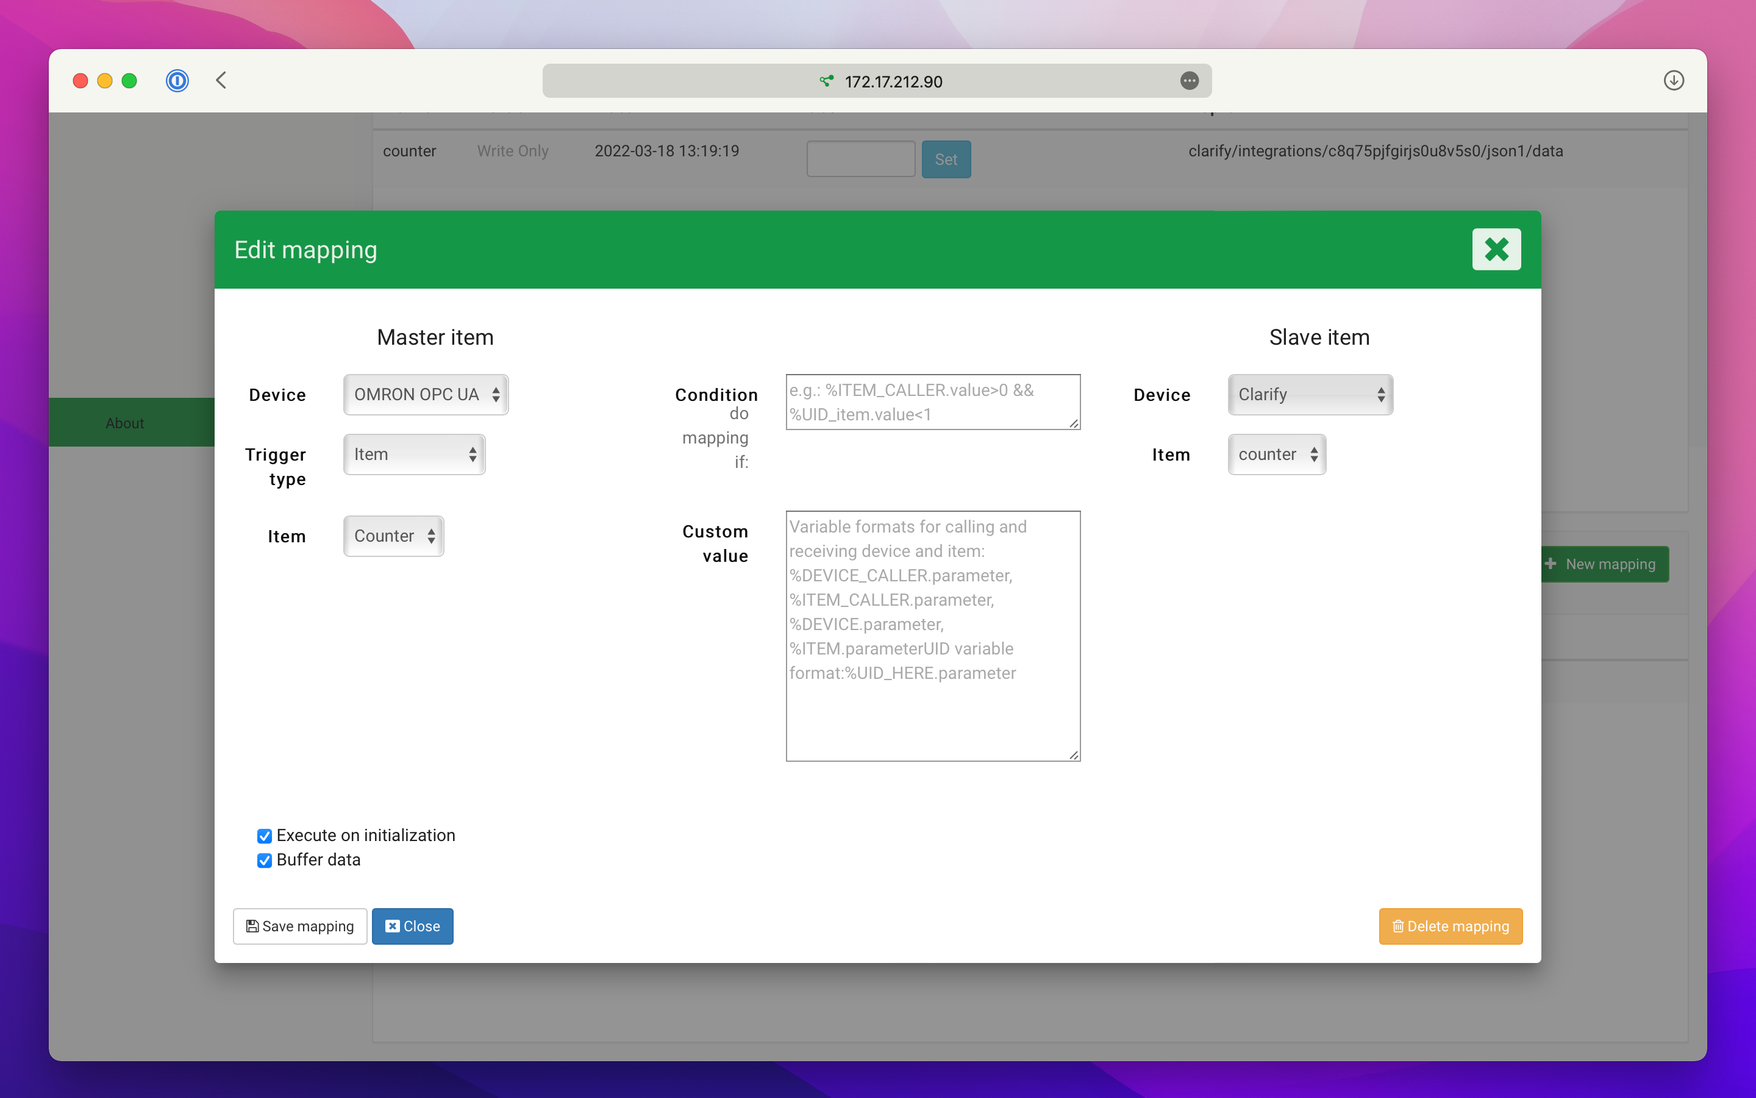
Next we need to create a mapping to connect the OPC UA item, and the MQTT item. While inside the Clarify MQTT instance, create a new mapping with these settings:
- Master item:
- Device: Your input device
- Trigger type: item
- Item: Your input item
- Slave item:
- Device: Clarify
- Item: counter
When sending data over MQTT, Clarify supports a maximum resolution of 1/s. This means that any portion of a timestamp with higher resolution will be removed when sent to Clarify.
Data that is sent to Clarify via MQTT is parsed into signals which can then be exposed as Items through a process called publishing. You can see how this is done in the video below, and at the end of it, you will have an Item in Clarify, complete with meta-data and the ability to see it's timeseries data.
SIA and Clarify both uses the term item, but there are some slight differences between the concepts. In Clarify, we say that the raw time-series data and meta-data from the source system is a signal while the object that exposes that data and information to the end-user is called an item.
For an explanation of the various concepts you'll encounter in Clarify, check out the concept section in our developer quickstart guide.
If you found any errors, ambiguities or have any suggestions on how to make this guide better, please contact us via chat or send an email to hello@clarify.io 🙌
Disclaimer By using our guides you agree to the following disclaimer.