Ewon Flexy
In this guide we will describe how to use the Clarify Java IO-Server for sending data (tags) from your Ewon device to Clarify:
Prerequisite
In Clarify, the ability to write data is linked to an integration, so to get started we will need to create an integration (or use an existing one) and issue a set of Basic Auth credentials that we can use to authenticate with. Take a note of the username and password as you will need to add them to the config later.
Clarify Java IO-Server
To follow this guide you will need the IP-address and admin access to your Ewon device. Guides for how to access and use ftp to upload files to your device can be found on the Ewon support pages.
This is the easiest way to get started sending data from your device to Clarify. The application uses MQTT under the hood.
-
Download the latest release of our application from here: https://github.com/clarify/ewon-clarify
-
Connect to your device via FTP and upload the
Clarify.jarand thejvmrunfiles to the/usrfolder on your device.If a
jvmrunfile already exists. Add the following lines to the file.#IOSERVER -heapsize 5M -classpath /usr/Clarify.jar -emain MainClass

-
Reboot your device and use a web browser to access the management interface of your device. There will now be a new IO-Server named Clarify available. Navigate to Tags -> IO-Servers -> Clarify.
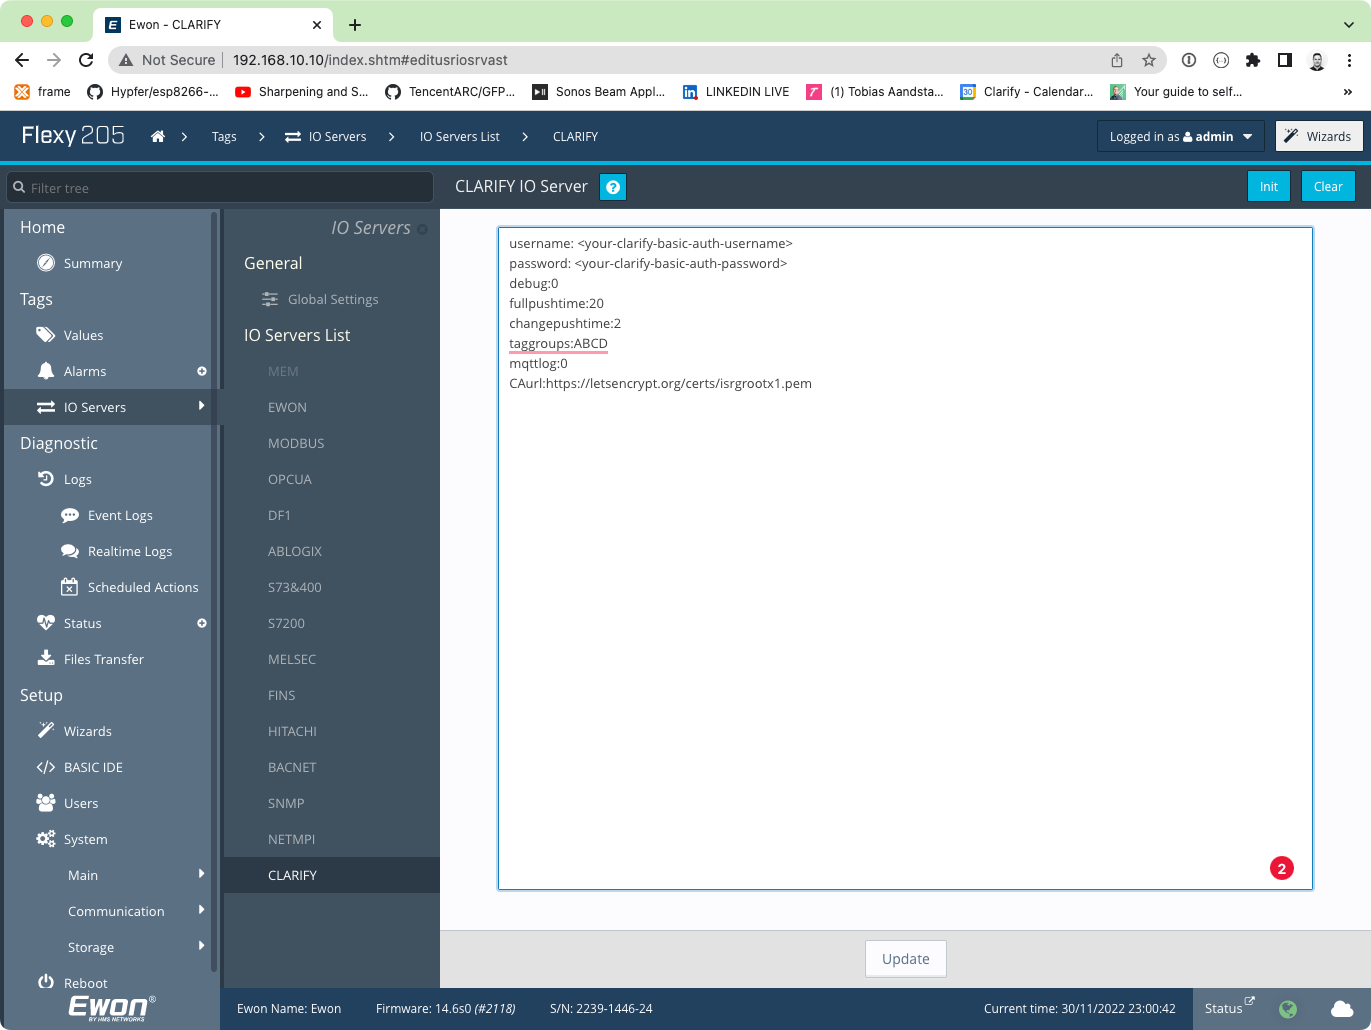
The only required config parameters are
usernameandpassword, the other parameters have sane defaults, but can be configured as follows:username:<your-clarify-integration-username>password:<your-clarify-integration-password>fullpushtime:20changepushtime:2taggroups:ABCDmqttlog:0CAurl:https://letsencrypt.org/certs/isrgrootx1.pemdebug:0CA CertificateThe communication between the device and our MQTT broker is encrypted and we get our SSL certificates from Let's Encrypt. The Java application will check for the existence of the CA certificate and download a new from let's encrypt if not found.
-
Applying the config will restart the Clarify service and when inspecting the Event Log you should see that the service has started and connected to Clarify.
[CLARIFY] CLARIFY MQTT service v1.0 started[CLARIFY] Connected to Clarify
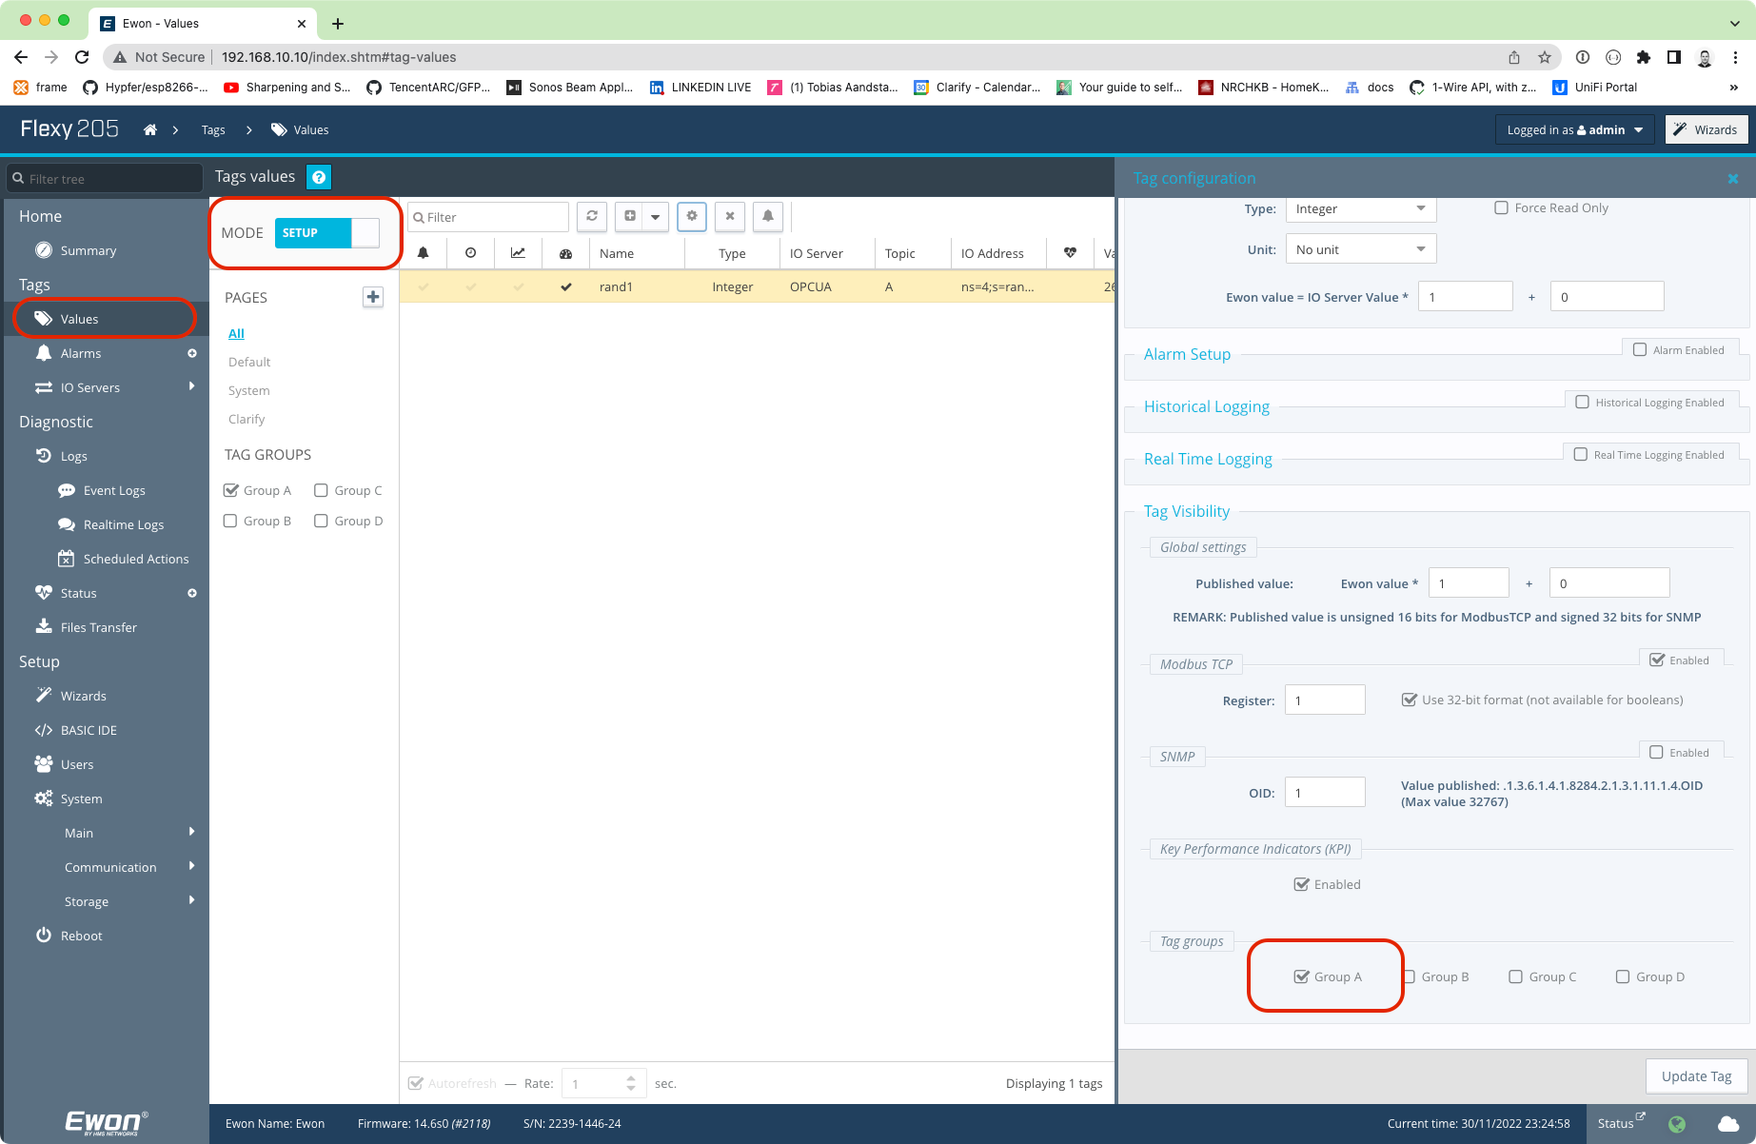 Tag Groups
We recommend to choose one Tag group to log, e.g Group A, and then add all tags that you want to log to that specific group. This makes it easy to control what tags are being logged.
-
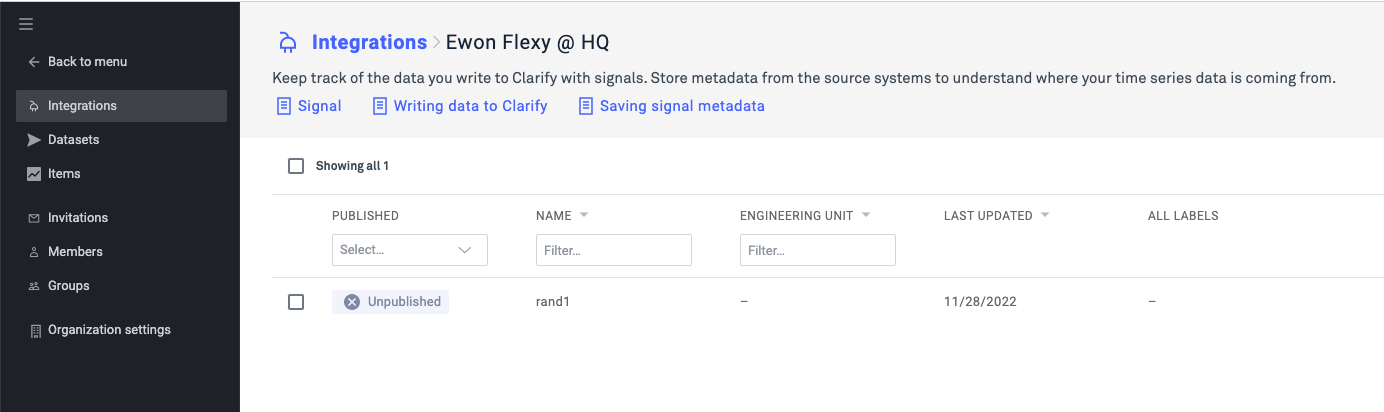
Check the signals in your Clarify Integration and verify that the chosen tags have been created. To look at the data you need to publish the signal.


For an explanation of the various concepts you'll encounter in Clarify, check out the concept section in our developer quickstart guide.
If you found any errors, ambiguities or have any suggestions on how to make this guide better, please contact us via chat or send an email to hello@clarify.io 🙌
Disclaimer By using our guides you agree to the following disclaimer.