OpenWeatherMap
In this guide, we will show you how to gather data from OpenWeatherMap using Node-RED, process, and insert the data into Clarify.
OpenWeatherMap is an online service, owned by OpenWeather Ltd, that provides global weather data via API, including current weather data, forecasts, nowcasts, and historical weather data for any geographical location.* (Wikipedia)

To be able to follow this guide you will need:
- An OpenWeatherMap account with a api-key: https://openweathermap.org/appid.
We will assume that you have basic knowledge and a working instance running Node-RED, if not please read our Introduction and the guide on how to Install Clarify node.
Getting the Weather data
In this guide, we will be using the OpenWeather map node. This node provides
weather data for a specific location, this can be current weather, 5 day forecast or combined weather/forecast for. In this guide, we will use the current weather option.
The data retrieval is triggered on an interval which will give us continuous
data.
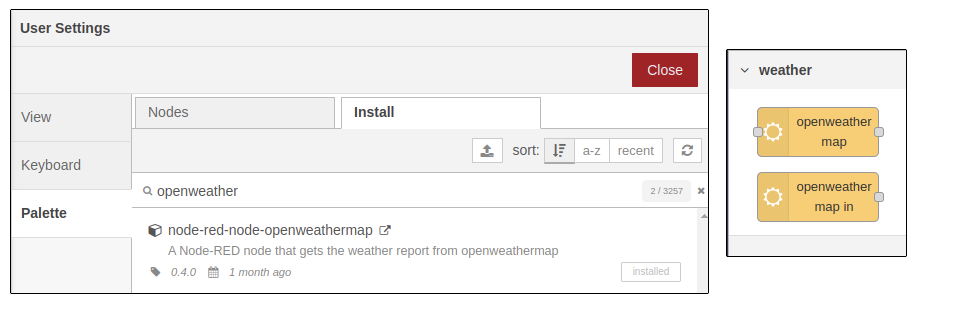
Start by dragging the node onto an empty flow, and configure the node with your
api-key and location (for example Trondheim, NO, you can also use
https:///developer-guides/openweathermap.org/find to be sure that your location is available).

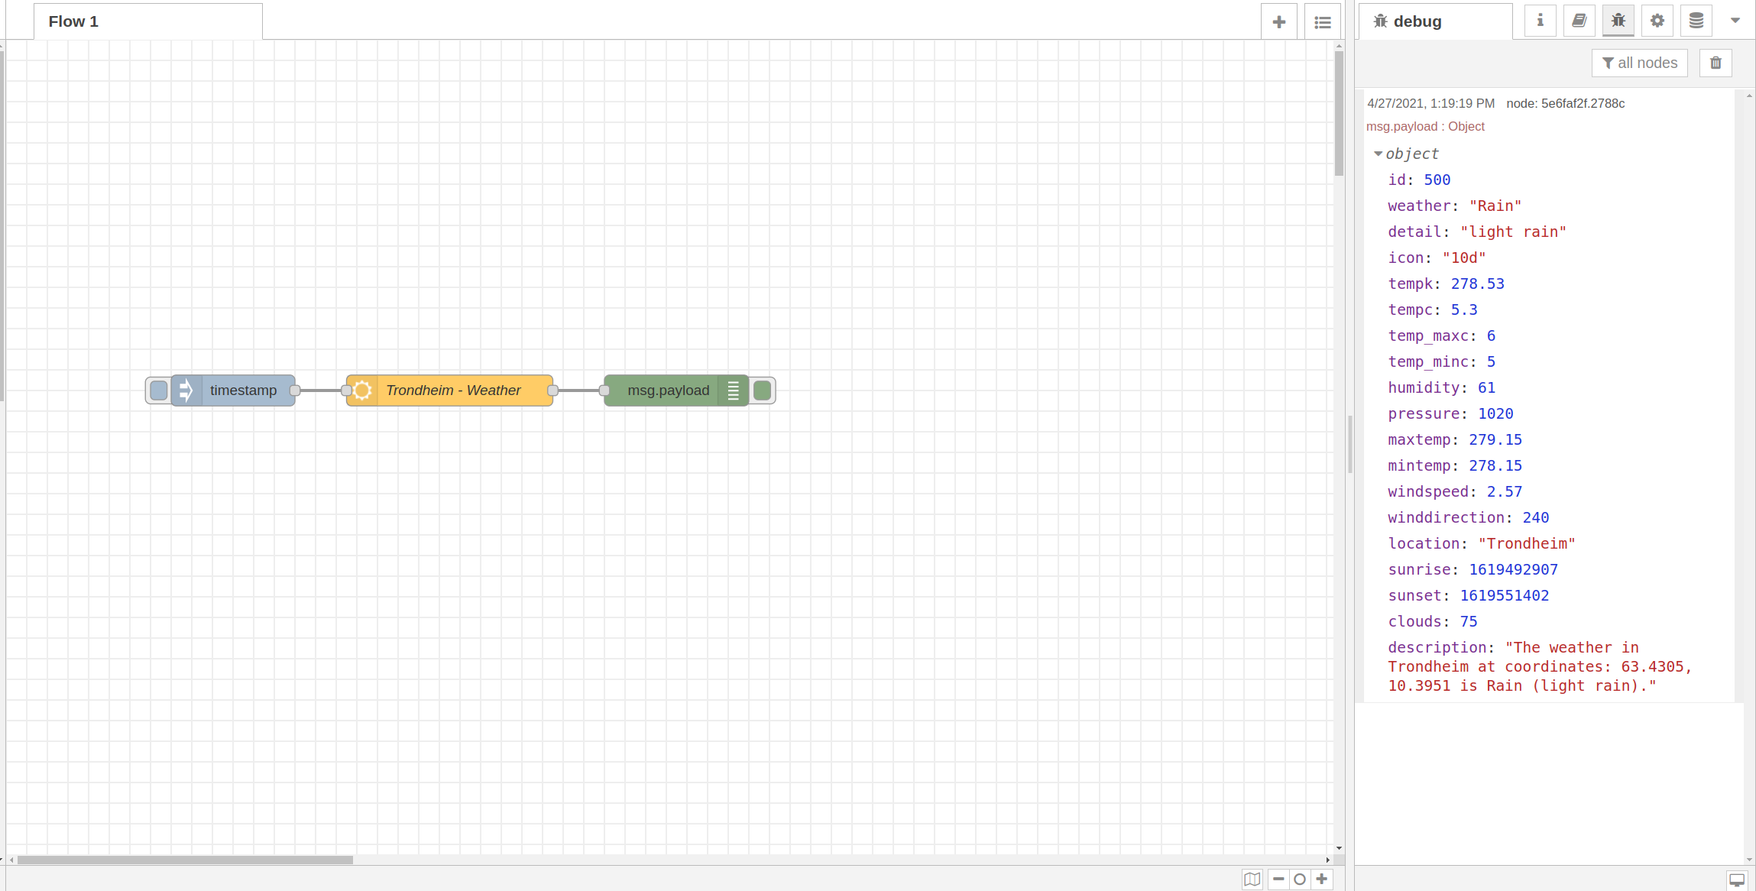
Drag in an insert node to trigger the flow and connect a debug node to inspect the result. The flow and result should look like the image below. As you can see we have the location of Trondheim, Norway. This gives the current weather which includes temperature, humidity, wind speed, etc.
Process and prepare for Clarify node
The next step is to create a function that processes the data from OpenWeatherMap, into one message per measurement. This message must contain the meta-data and value. The ID of the message can be picked by you but must be consistent. In this guide, we use the name of the location together with the measurement name. We also set the name of the signal and adds some more info as labels to easier distinguish between the signals in the Clarify Admin Panel.
The code for the processing is given below and can be copied into a function node and added to the flow.
let outputMsgs = [];

// define the data that we're interested in
let dataPoints = [
  "tempc",
  "temp_maxc",
  "temp_minc",
  "humidity",
  "pressure",
  "windspeed",
  "winddirection",
  "clouds",
];

extractData(outputMsgs, msg.payload);

// Add additional data to each measurement
outputMsgs.forEach((m) => {
  m.signal.labels["country"] = [msg.location.country];
  m.signal.labels["city"] = [msg.location.city];
});

return [outputMsgs];

// Process every main- and sub-module, extract available measurements
// and generate the input that the Clarify node expects.
function extractData(res, m) {
  // get the current time as ISO.
  let time = new Date().toISOString();

  // go through the entries from the response from openweathermap.
  Object.entries(m).forEach((entry) => {
    const [key, value] = entry;
    // add the data if the key is in out dataPoints.
    if (dataPoints.includes(key)) {
      res.push({
        topic: m.location.toLowerCase() + "_" + key,
        signal: {
          name: key,
          labels: {},
        },
        payload: {
          times: [time],
          values: [value],
        },
      });
    }
  });
  return res;
}

Write data to Clarify
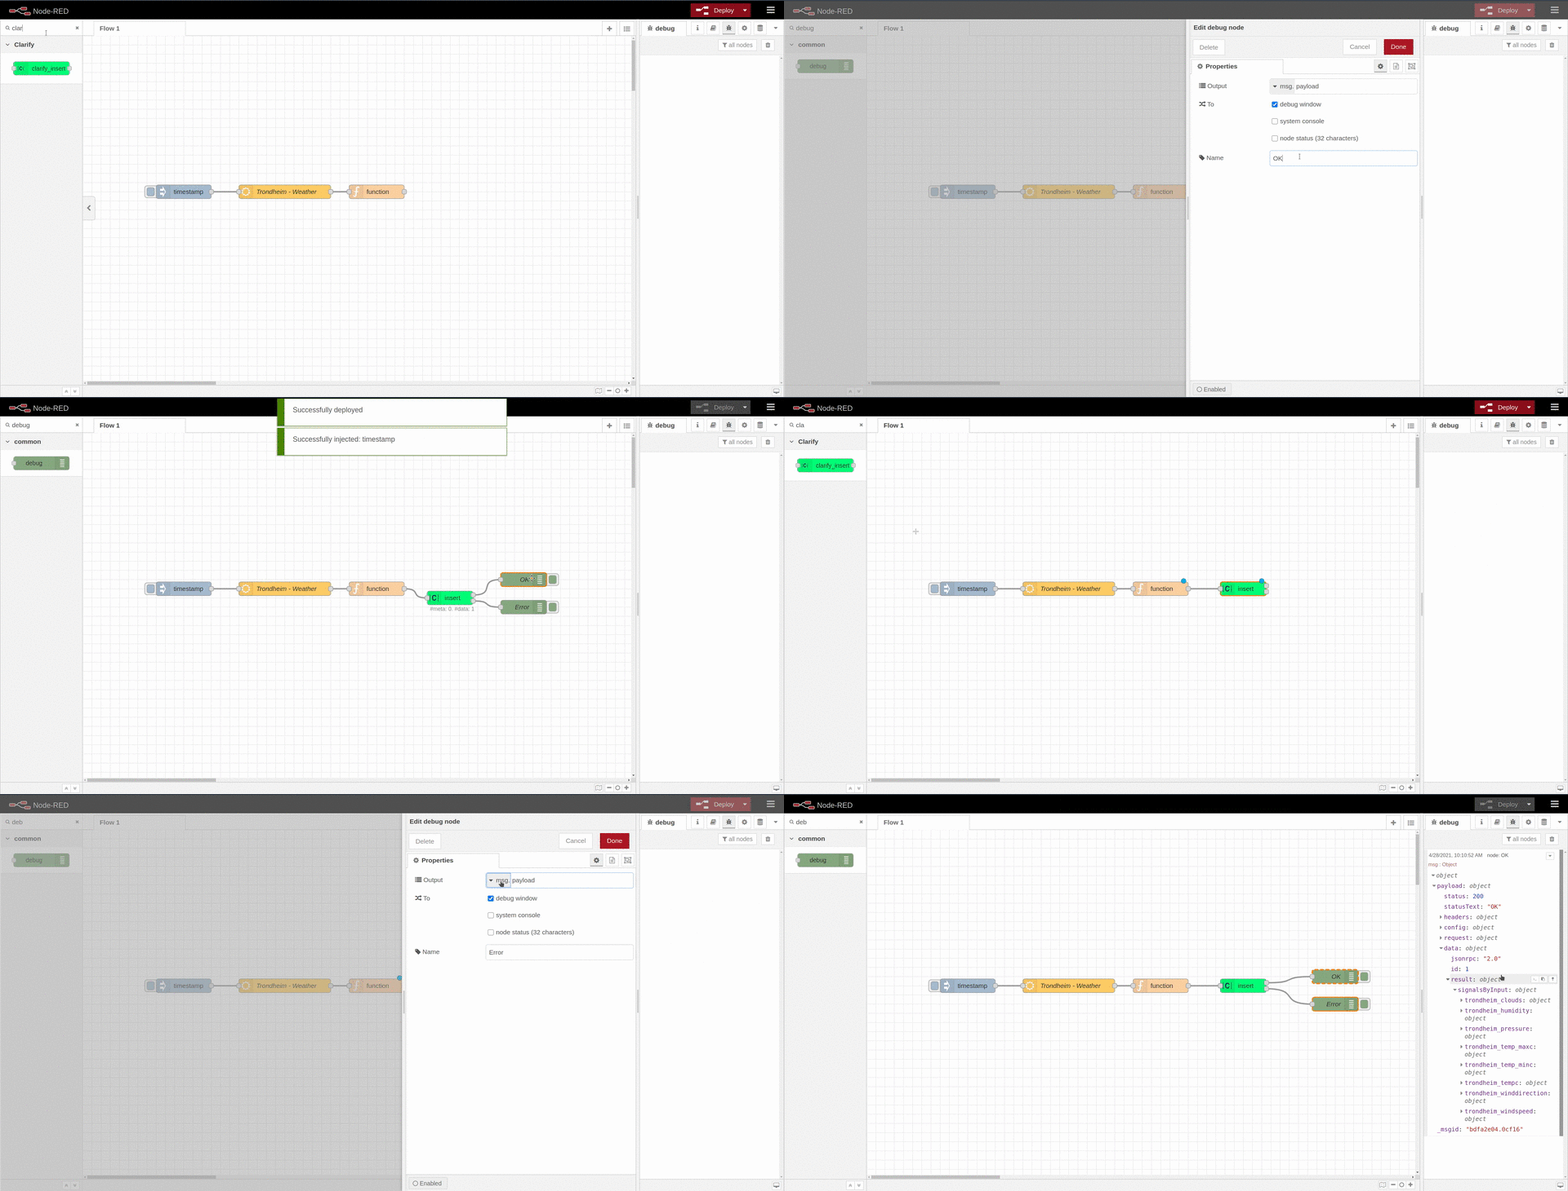
The messages now align with the format that Clarify node expects and we can then add the Clarify insert node to the flow and wire it up. The debug panel will show the responses from the Clarify-API.
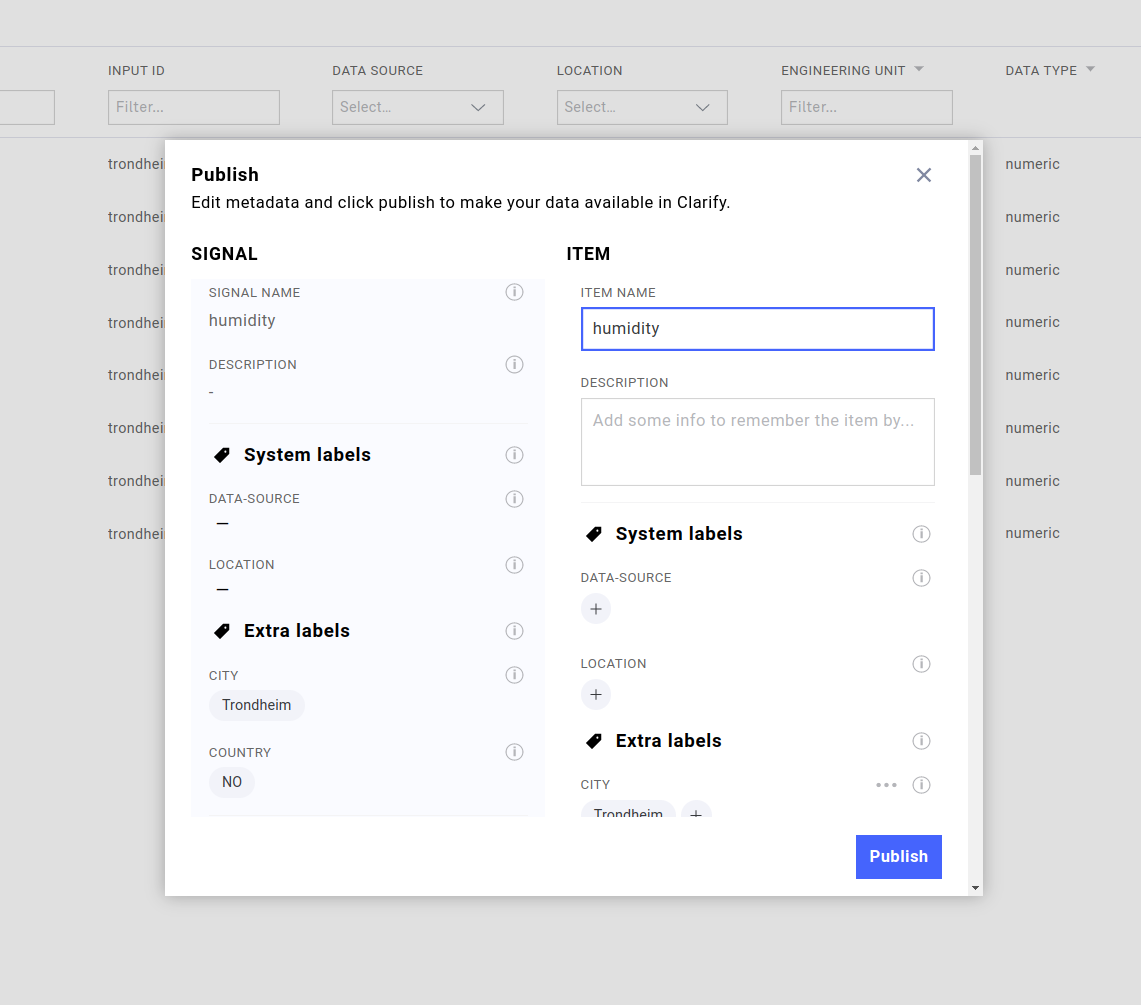
If everything works as expected you should now find all the new signals when looking in the Clarify admin panel. Choose a signal and publish it to view the data in the Clarify Timelines view.

After you have verified that your flow works as expected remember to set the inject node to run periodically. Every 10 minutes should be appropriate for the OpenWeatherMap data source.
Congratulations - you should now have a working OpenWeatherMap integration that fills your Clarify instance with interesting weather data for your desired location.
If you found any errors, ambiguities or have any suggestions on how to make this guide better, please contact us via chat or send an email to hello@clarify.io 🙌
Disclaimer By using our guides you agree to the following disclaimer.